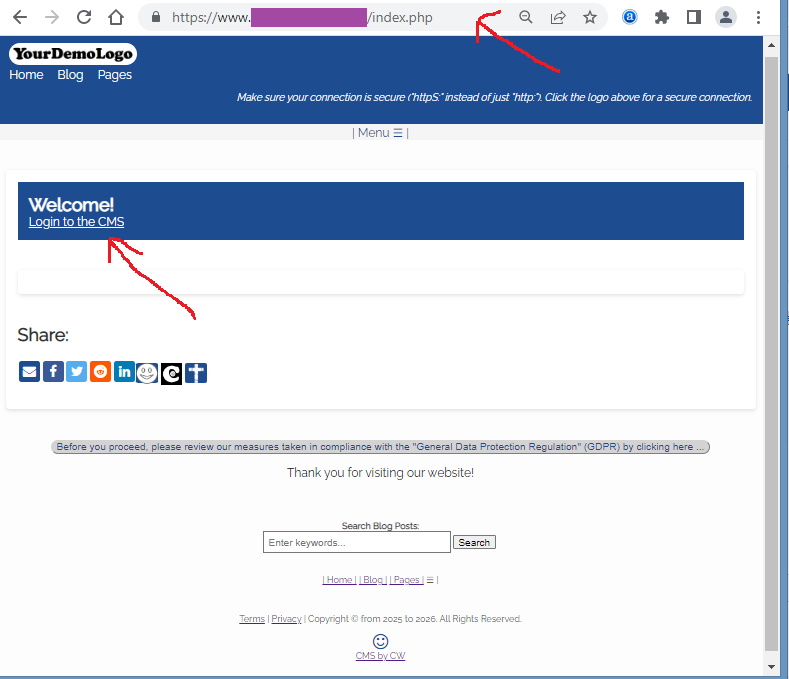
Make sure your connection is secure ("httpS:" instead of just "http:"). Click the logo above for a secure connection.
Make sure your connection is secure ("httpS:" instead of just "http:"). Click the logo above for a secure connection.
Published on: 02/10/2026, 06:28 PM by Software Developer
Here is how to Add a New Blog Post to your CMS:
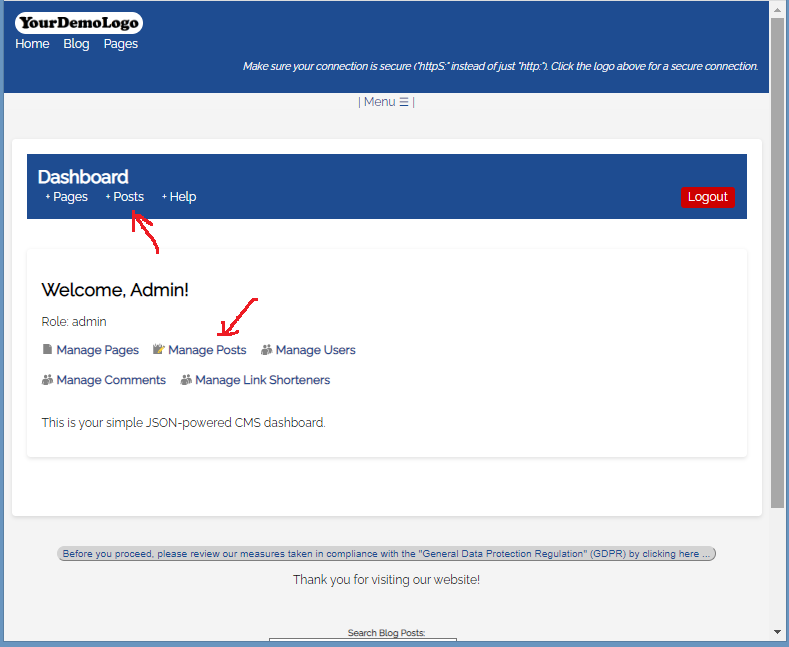
In the CMSbyCW Package, both user roles, Admin and Editor can Create, Add, Edit and Delete Blog Posts.
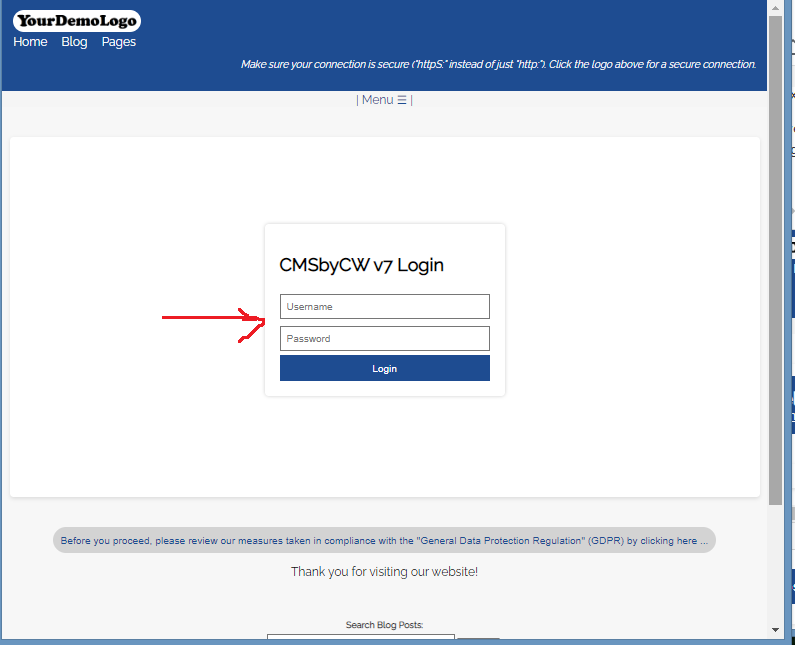
For this example, login as an Admin
Just type your Admin Username, Password, and click the Login Button
(Notice that I have also included a "Help" link in the Dashboard header, so you always have a direct link to the CMSbyCW documentation or FAQs, in case you need that resource).
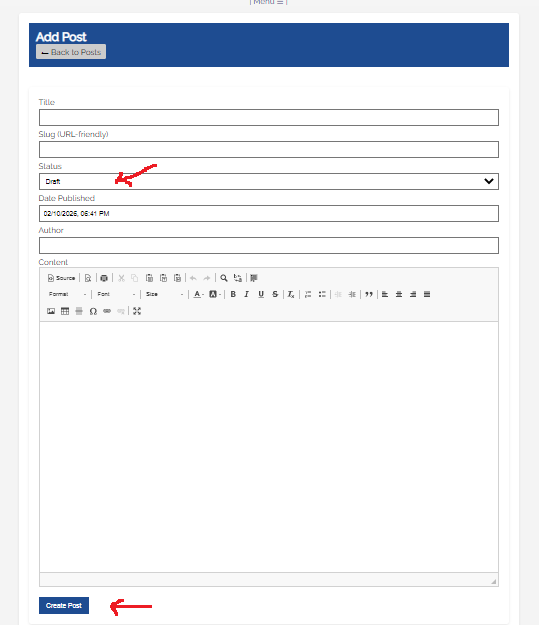
Type the title you want for your post. For example 01-Test Post
From the above example, your post "Title", you can type on the field "01-test-post", or whatever slug you want the Blog Post to get anchored to. .
This refers to your Post Status, whether it is in "Draft" Mode, or "Published" Mode.
- You have to select "Published" mode for the new blog post to display on the Blog.
- When you select "Draft", only the title will display on the Blog, but the contents will not display. Draft mode can only be viewed when you are logged in, and you can change the Status to "Published".
This is automatically timestamped by default. But you can also tweak this, with the same format, if you want.
This is also "free text" you can type the Author's Name that you want to display on the front end.
In the Content Box, you have options on the Three Rows with Icons, (just hover your mouse on the Icons, so it displays the options you have, like
First Row:
"Source" - you can toggle between WYSIWYG (What You See Is What You Get) Mode, or Source Code Mode.
"Preview"
"Print"
etc. You can test and experiment on it too to get familiar :-)
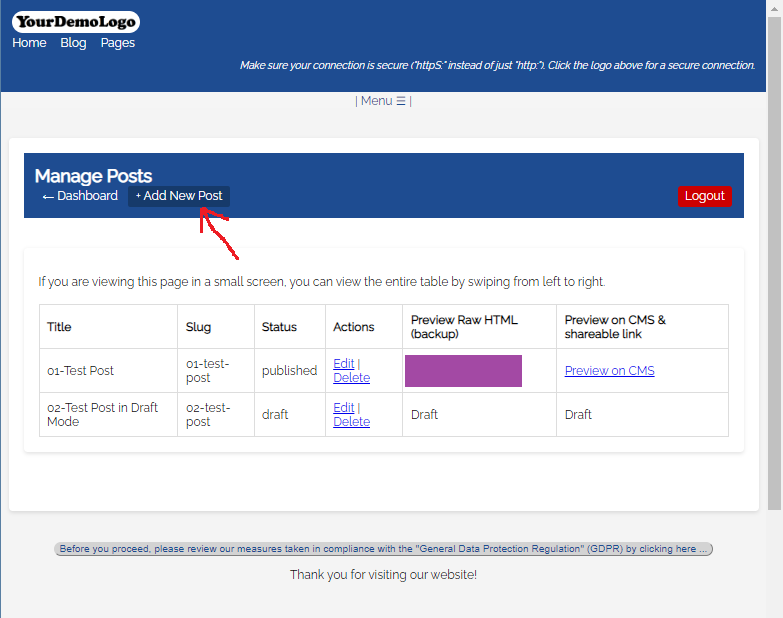
The Software Package comes with 1 Test Post that has a Status of "Published" and another Test Post that was created, but has a Status of Draft. You have the option to remove those 2 Test Posts, since I have already added also the "Help" module for tutorials.
Your new Blog Post should display.
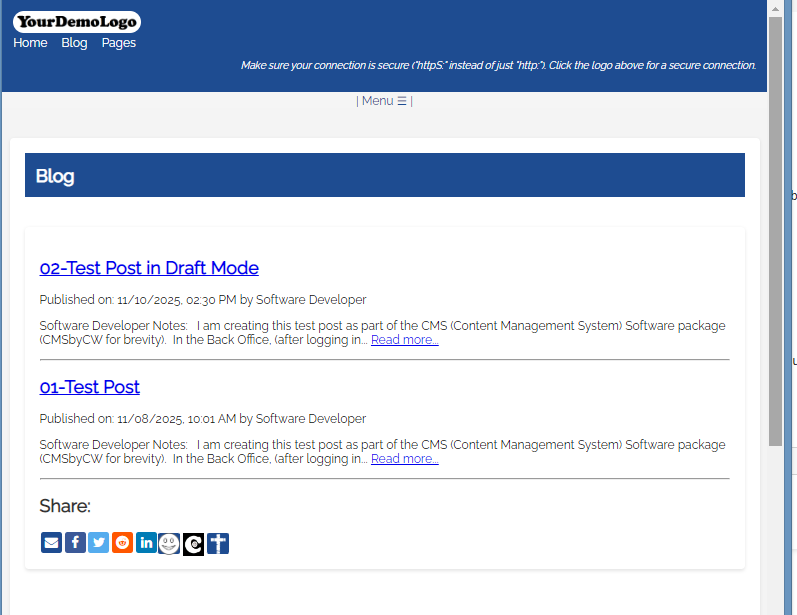
If your new post does not display, double check and make sure you go back to your Dashboard, and click the "Edit" link, under the "Actions" column, and when you view your new post, that you have selected the Status "Published" and not "Draft".
Or go to the Help Page for other Documentation or Tutorials:
Thank you for visiting our website!